So I was thrilled when Tara from Loki's Lacquer contacted me to do a review of her new addition to her line: Nail Vinyls. I received a small selection of vinyls and decals that are available in her shop - and I got something else extremely exciting in my envelope, but I'll return to that in a while.
For you to get a feel for what she can offer, here are the vinyls and decals I got:

I fell in love with the small triangles since I thought they would make a nice change from studs and beads.
The vinyls are all made from high quality vinyl and feel a bit thicker than NailVinyls (from @teismom). But they are very easy to work with and the thickness also refrain the decals from shriveling and melting - though very fine details do tend to melt over time.
I decided to try out the waves first since I'd had a particular idea involving brown polishes and some colour blocking that I've been toying with for a while. So here was an excellent excuse to get it done :D
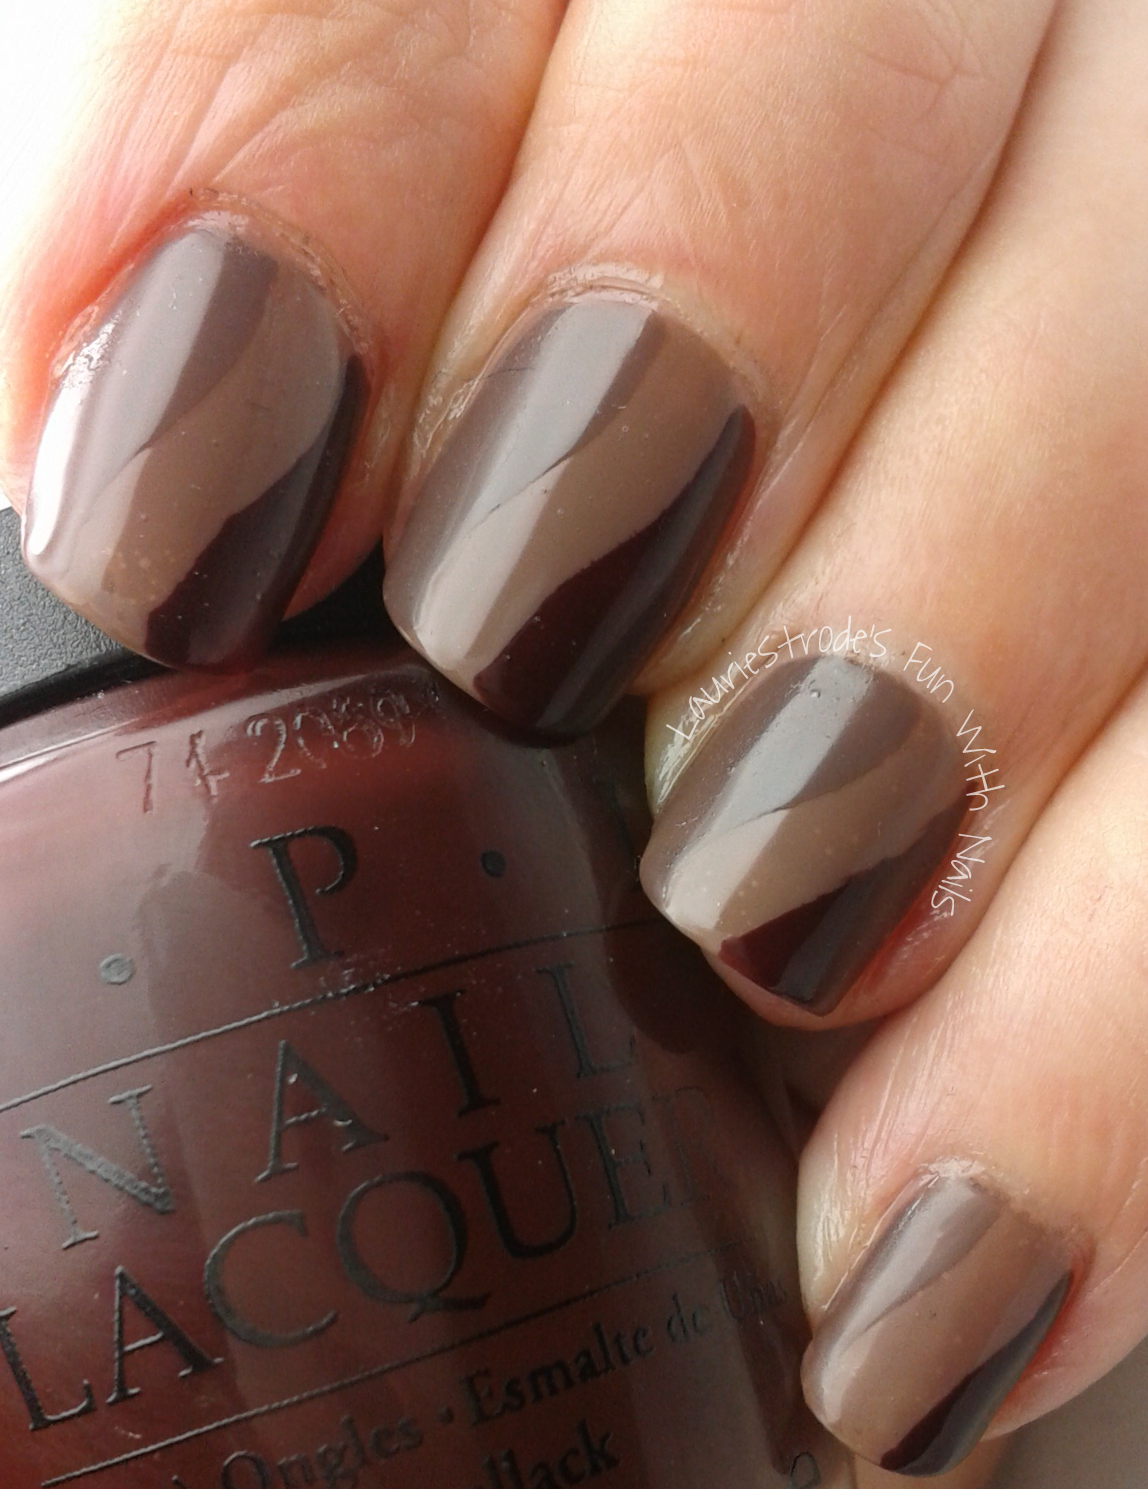
I started with a base colour, OPI Over the Taupe. I topcoated it and then I let it dry completely.
I applied the wavy nail vinyl in the middle of every finger and painted with OPI You Don't Know Jacques on the right side of the vinyl and with OPI Suzy Says DA! on the left side - one finger at a time! I removed the vinyl immediately after I'd applied the polish in order to get crisp lines.
I let it dry for a couple of minutes and then put on a fast drying top-coat - et voilá: chocolate nails :D
One thing I noticed was that the vinyl was rather wide which did cause some slight problems when it came to my ridiculously small little finger nail ;) - it took some re-positioning in order to get a decent pattern. But I prevailed and it came out really well I think.
For my next mani I chose a combination of guides and decals. I decided to do a french tip mani, mostly because I hate using french tip guides since I really don't like my smile line too deep and it always is if I use regular french tip guides. What I noticed with these was they look slightly less curved than what I usually see, so my curiosity got tickled :D.
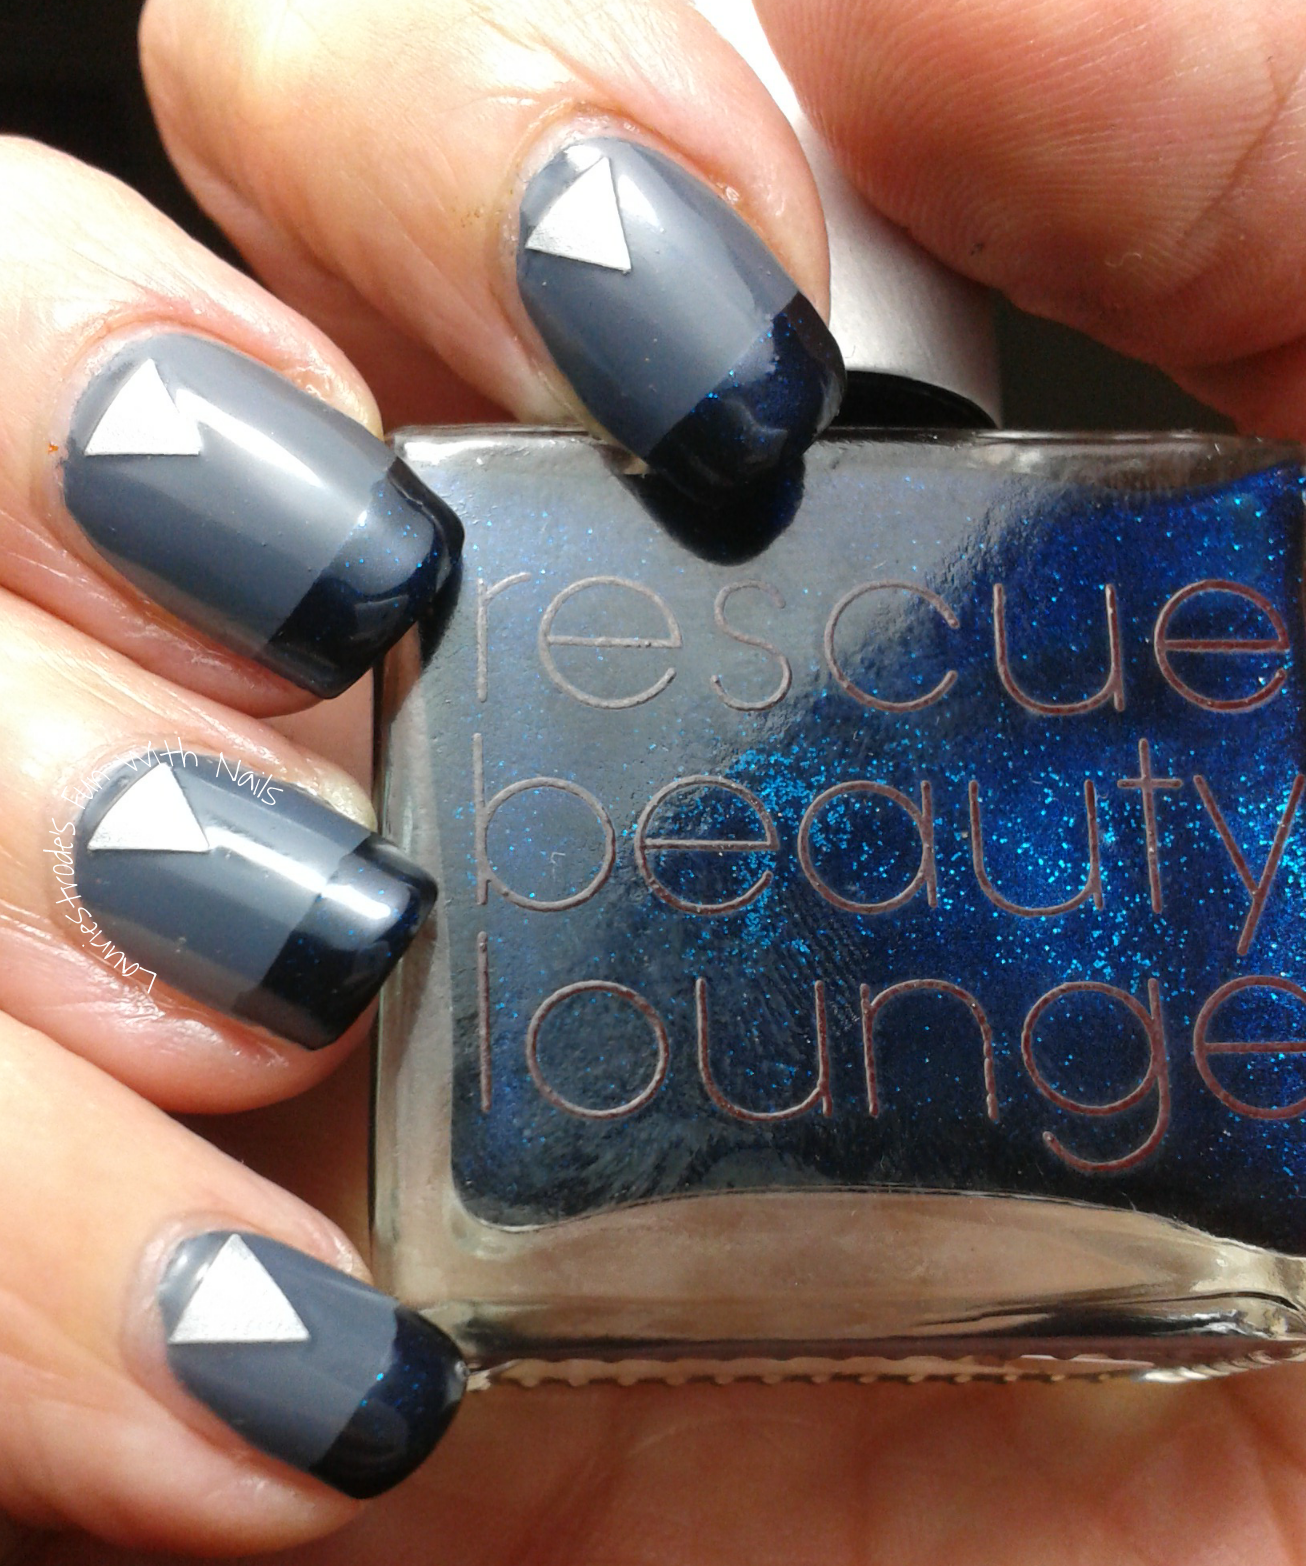
For this look I started out painting my nails with RBL Forgotten Road and topcoated it. Then I let it dry completely before using the french tip guide, doing one nail at a time.

I aligned the tip guide immediately below my smile line on my tip and then painted with a liberal layer of RBL Under the Stars to get good coverage.

I removed the tip guide at once I finished to ensure a crisp line. I then positioned the triangles and finished my mani with another layer of top coat.
And now for the thing that really had me excited: Loki's Nail Aprons. Yes, I know it sounds crazy but this is really what these suckers are. Take a look at this:
 |
| Make sure you fit them so they slightly overlap - you can probably guess what'd happened in the middle when I removed them |
They are made of a diffent kind of vinyl than the rest and according to Tara there is circa 10 uses in an apron before the nail polish changes its stability.

As you can see there is very little clean up needed when you use these nail aprons - and if you are more careful with your positioning of these little suckers than me you can definitely get an even cleaner finger with almost no cleaning needed. Which is a total win in my book!!!
So if you can't get school glue to work for you as shielding or if you get vaseline mixed in your makeup sponge when you do gradients but still want to cover your fingers to reduce the amount of clean-up then I can definitely recommend using Nail Aprons.
All in all I think it is safe to say that these vinyls are a great acquaintance. I like that Tara has both guides and decals in her shop, it makes room for versatility in one's nail art. And hellooooo there are some awesome decals there: Pacman, angels, TARDIS, Loki's helmet...it really speaks to my nerdy side :D
You can buy Loki's Nail Vinyls in her shop here - and yes she does ship internationally ;). Make sure to follow her on Facebook for promotions and news.
If you make nail art using them remember to hashtag them #lokisnailvinyls so Tara and others can enjoy your art work.
These were sent to me for my unbiased consideration.